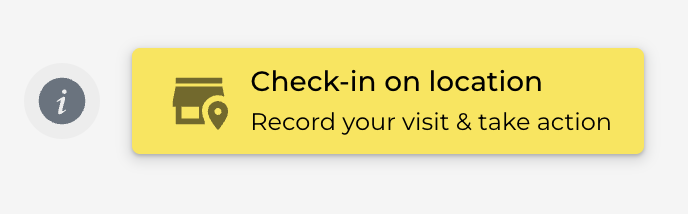
The geolocated check-in is one of the flagship features of the Sales Expert module. It lets your field representatives log their visits directly from the point of sale, with geolocation, and create orders, notes, and tasks linked to that visit.
ℹ️ Good to know
This feature is available only with the Sales Expert plan.
It is optimized for mobile use in the field.
Accessing check-in
1. Open PivoHub from your mobile device (or browser).
2. From the main menu, go to the Visits / Check-in section.
3. PivoHub automatically suggests points of sale near your current location.
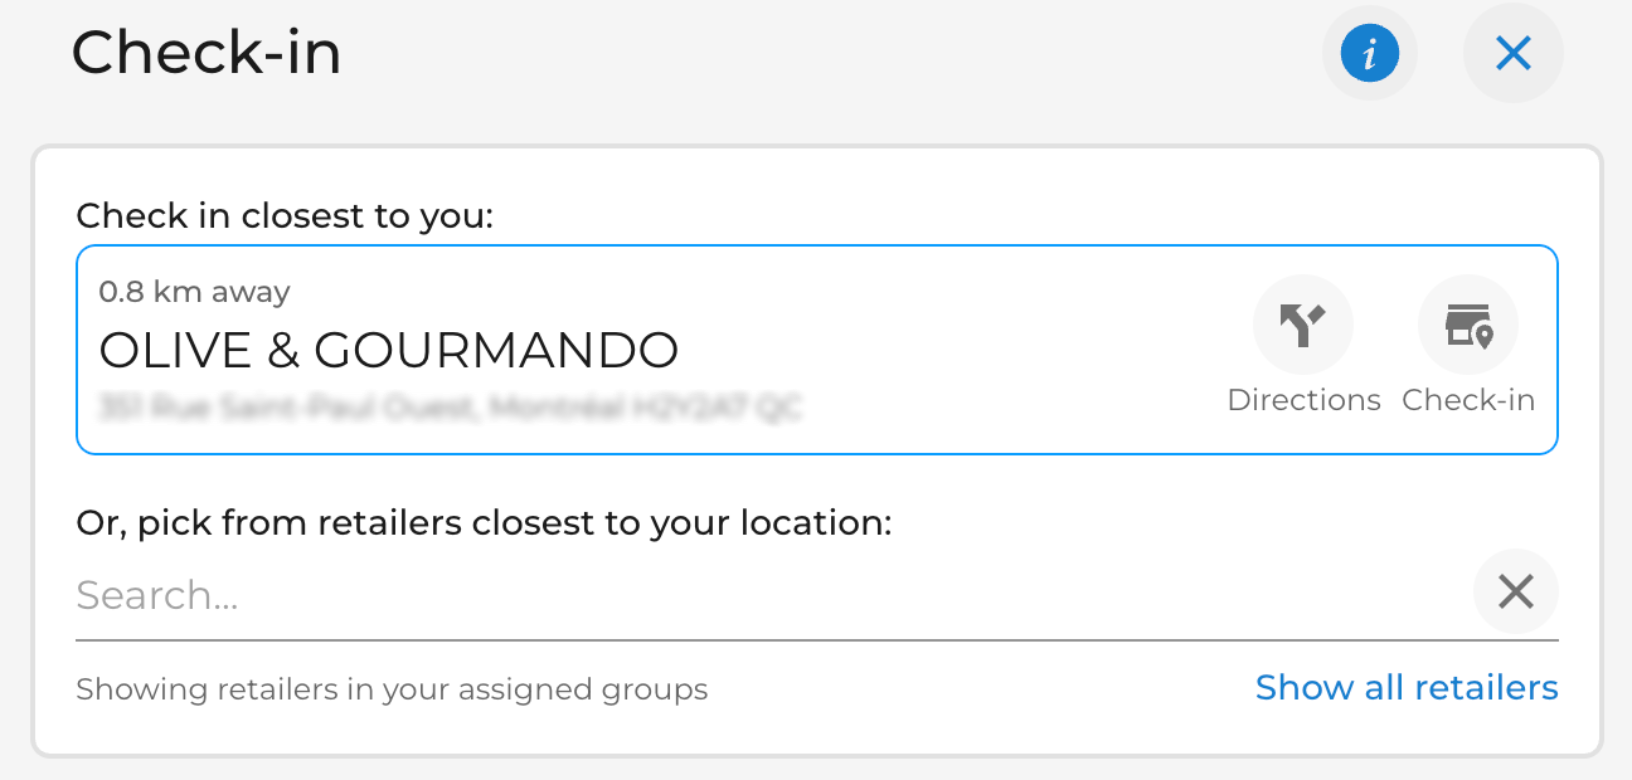
4. Select the customer you are visiting and tap Check in.
❓ Worth knowing
If the distance between your actual position and the customer's registered address is too large, PivoHub will display an alert.
You can still proceed with the check-in, but the gap will be recorded in the report.
What you can do during a check-in
Once the check-in is started, you have access to a quick-action menu:
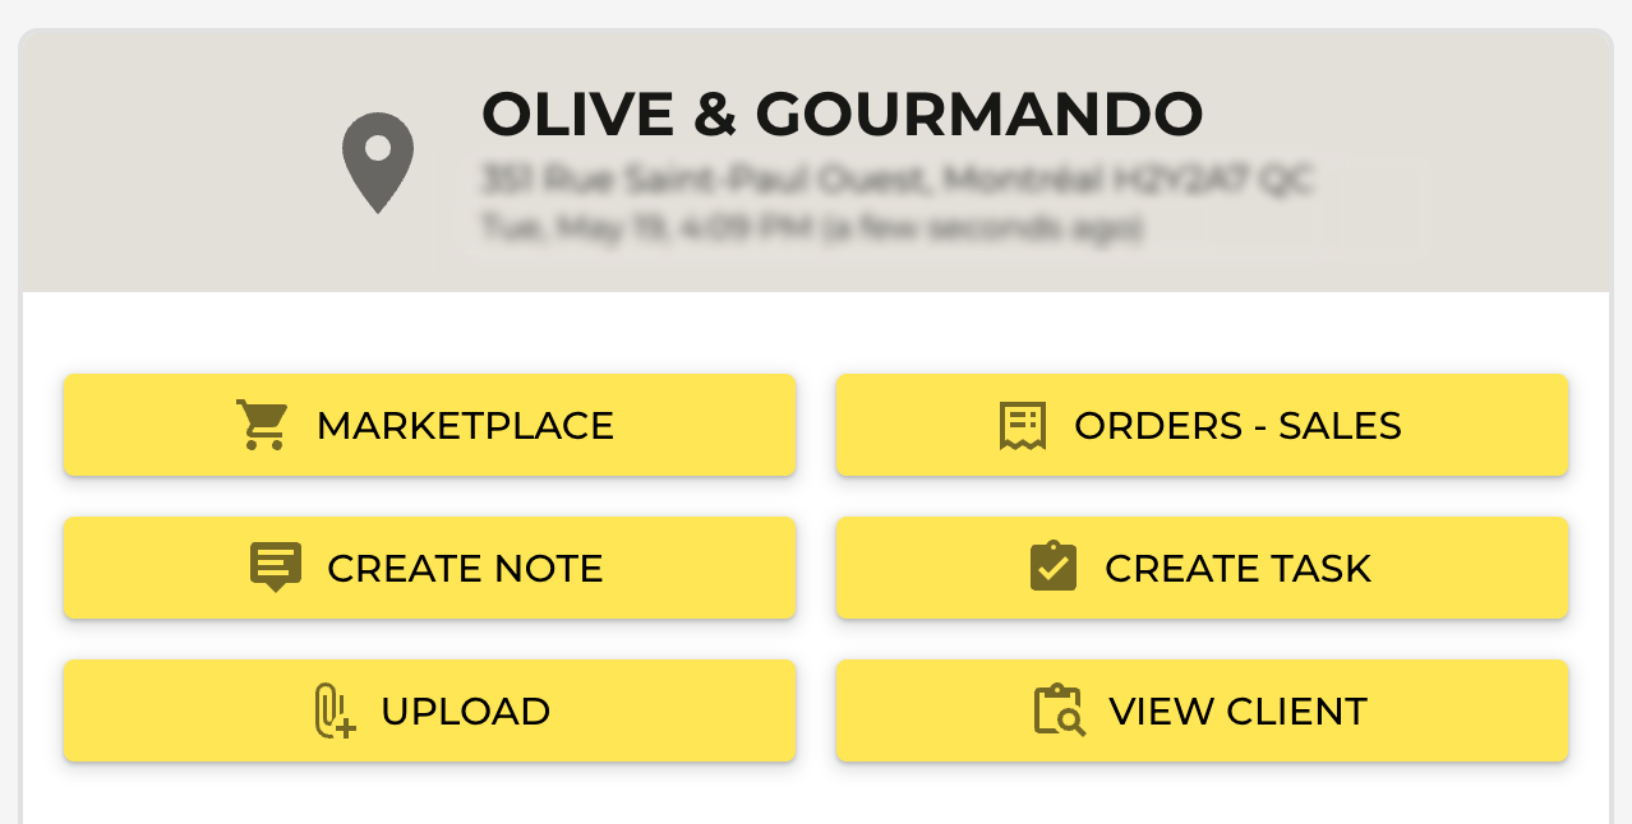
At the start of the check-in, PivoHub also displays any pre-existing tasks for this customer, so the representative can complete them during the visit.
Green buttons indicate actions already taken during this visit (e.g., an order created, a note added).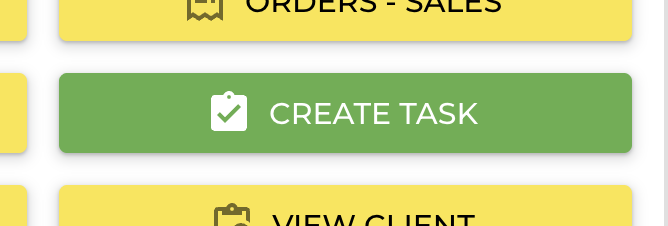
⚠️ Critical point
AN ORDER IS LINKED TO THE VISIT ONLY IF IT IS CREATED FROM THE CHECK-IN INTERFACE.
If the representative creates the order from the general Orders module (outside the check-in), it will NOT be associated with the visit in the check-in report.
For an order to appear in your visit reports, it must be created via the "Quick Order" button inside the check-in.
Ending the check-in
Once the visit is over, tap End visit.
The visit is saved with: date and time, representative's name, point of sale visited, measured distance, and every action performed.
This data is available in the Activity Log (admin view) and can be downloaded through the Check-in Report.
Setting up the visit checklist
Your administrator can configure a checklist for each customer group. Representatives complete this checklist during every visit. See the article: Configuring a checklist for field visits.
✅ Best practice
Field tip: review the open tasks displayed at the start of the check-in before beginning the conversation.
They summarize the follow-up actions planned for this customer (a product reminder, an issue to resolve, etc.).
Was this article helpful?
That’s Great!
Thank you for your feedback
Sorry! We couldn't be helpful
Thank you for your feedback
Feedback sent
We appreciate your effort and will try to fix the article