01 Log in to your account via this link: pivohub.com/app
02 Create a new route
Click on the new route creation button.

03 Name the route.

04 Description of the route
Add a description of your route. For example, how to distinguish it from an existing road.

05 Description of the road
Enter "West of Saint-Laurent" in the field provided for this purpose.

06 Message on the road
You can enter a message for this route, for example, the delivery frequency.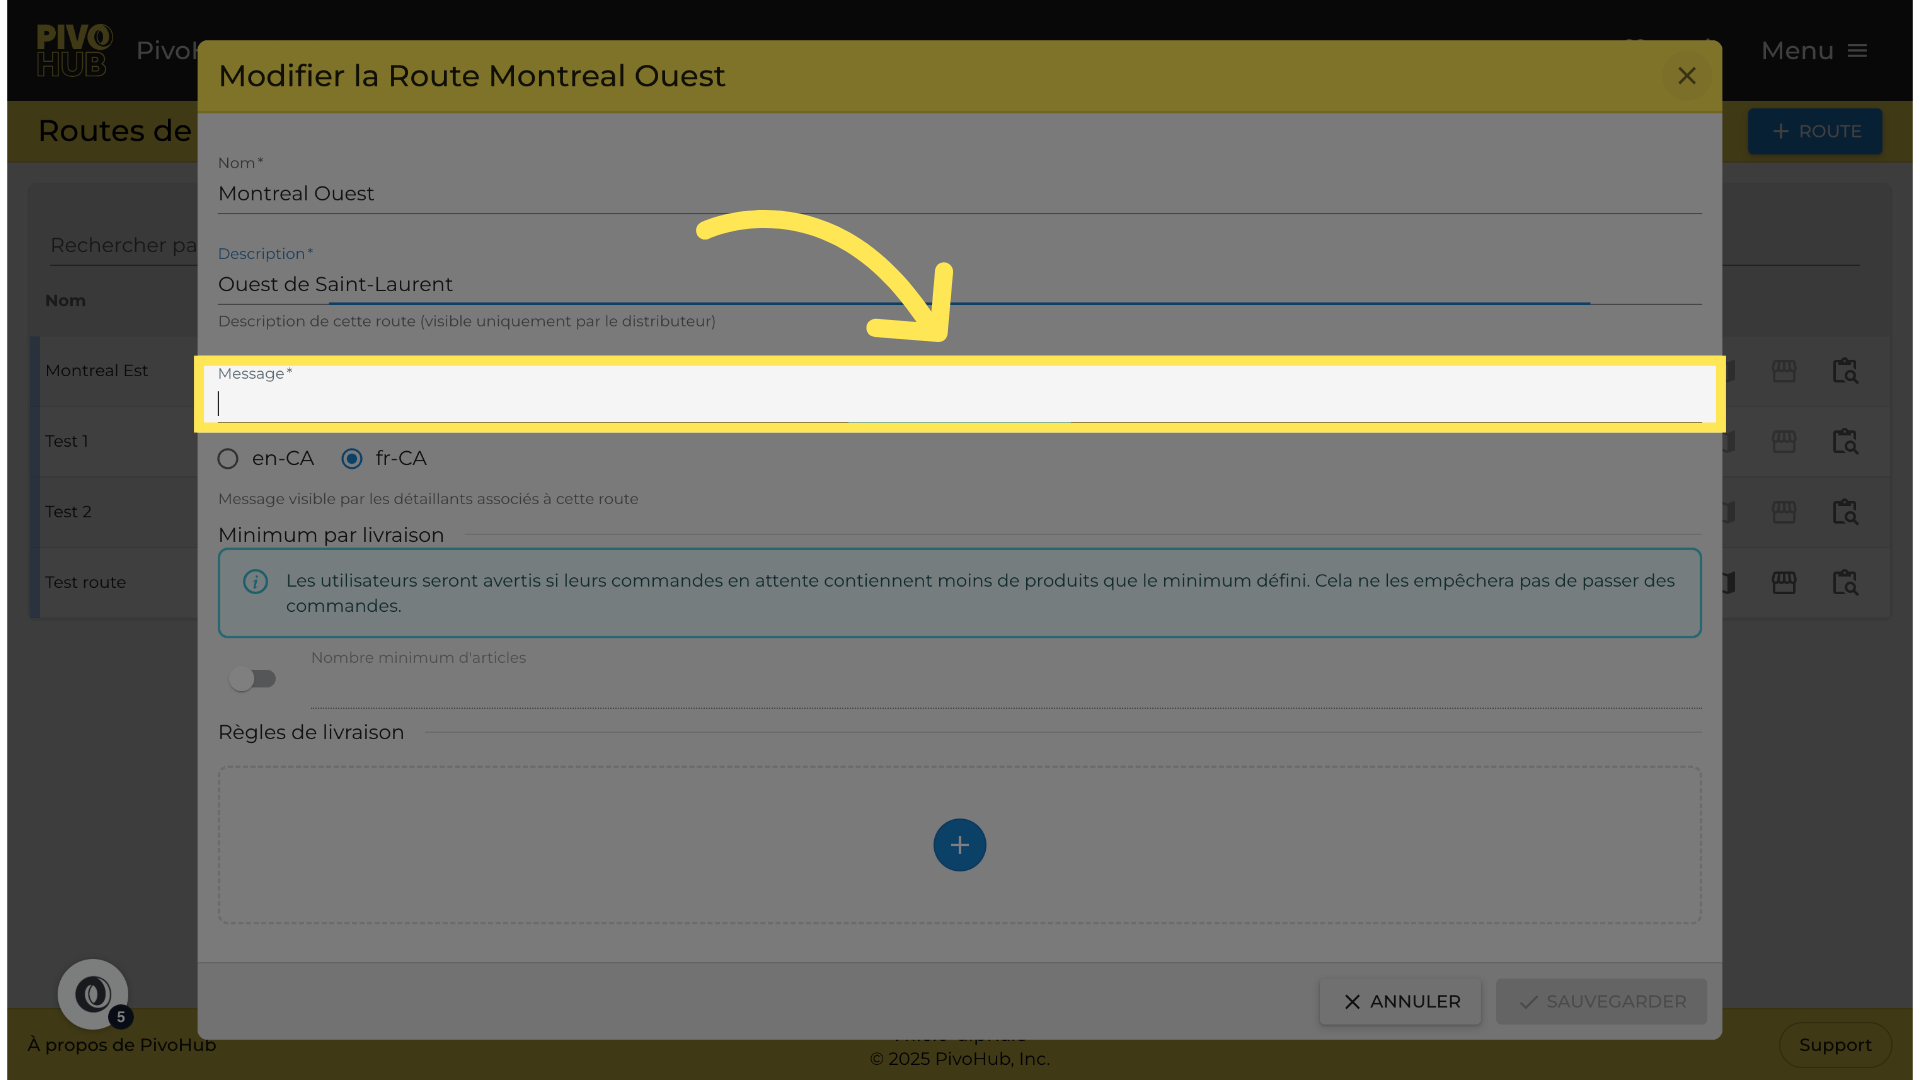
07 Description of the route
Fill the text area with a description or relevant comments for your route.
08 Save and create
Save your changes to create this new route.
09 Go to your retailers Go to your retailers
Now navigate to the tab of your retailers.
10 Select retailers
You can select one or more retailers to add or remove from a route using the selection boxes.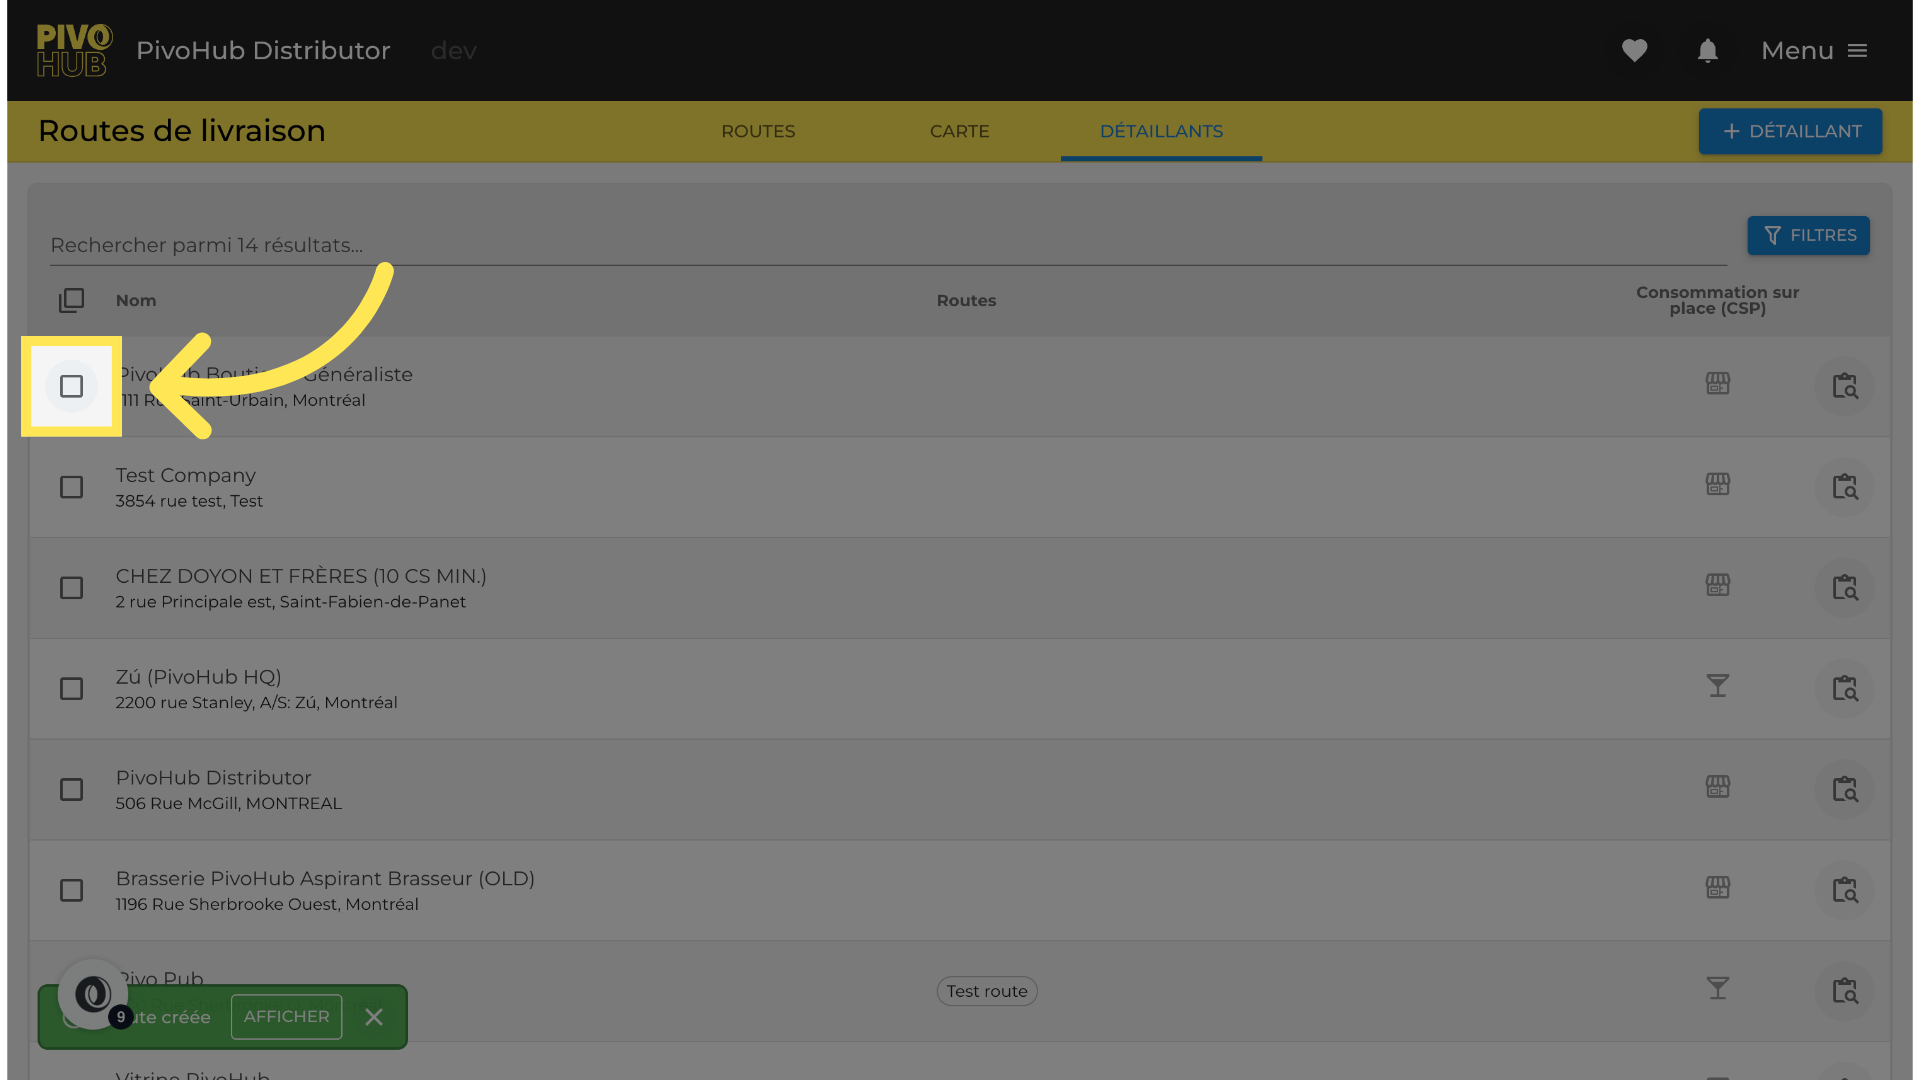
11 Select retailers
Select the stores and merchants to include in the distribution route.
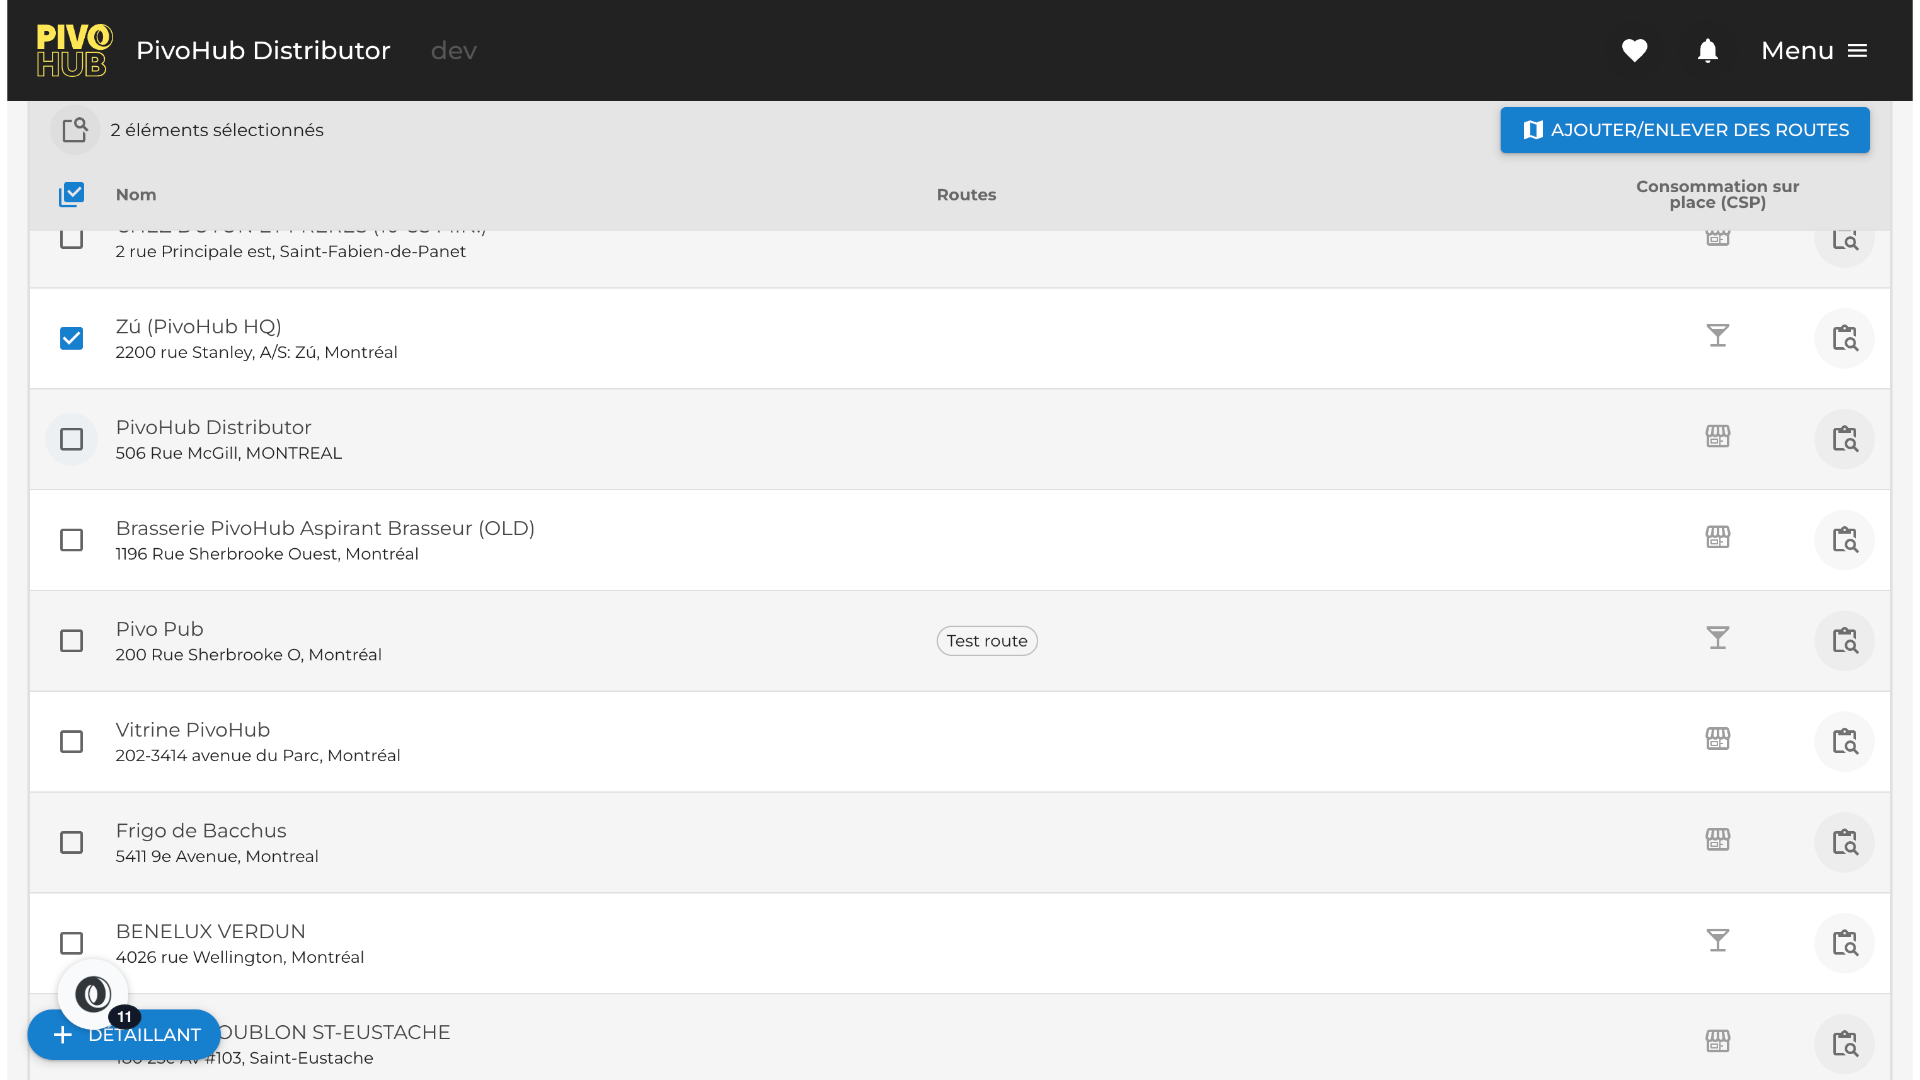
12 Add Your Retailers
Click on the mass action button to change the membership of the selected retailers to a route.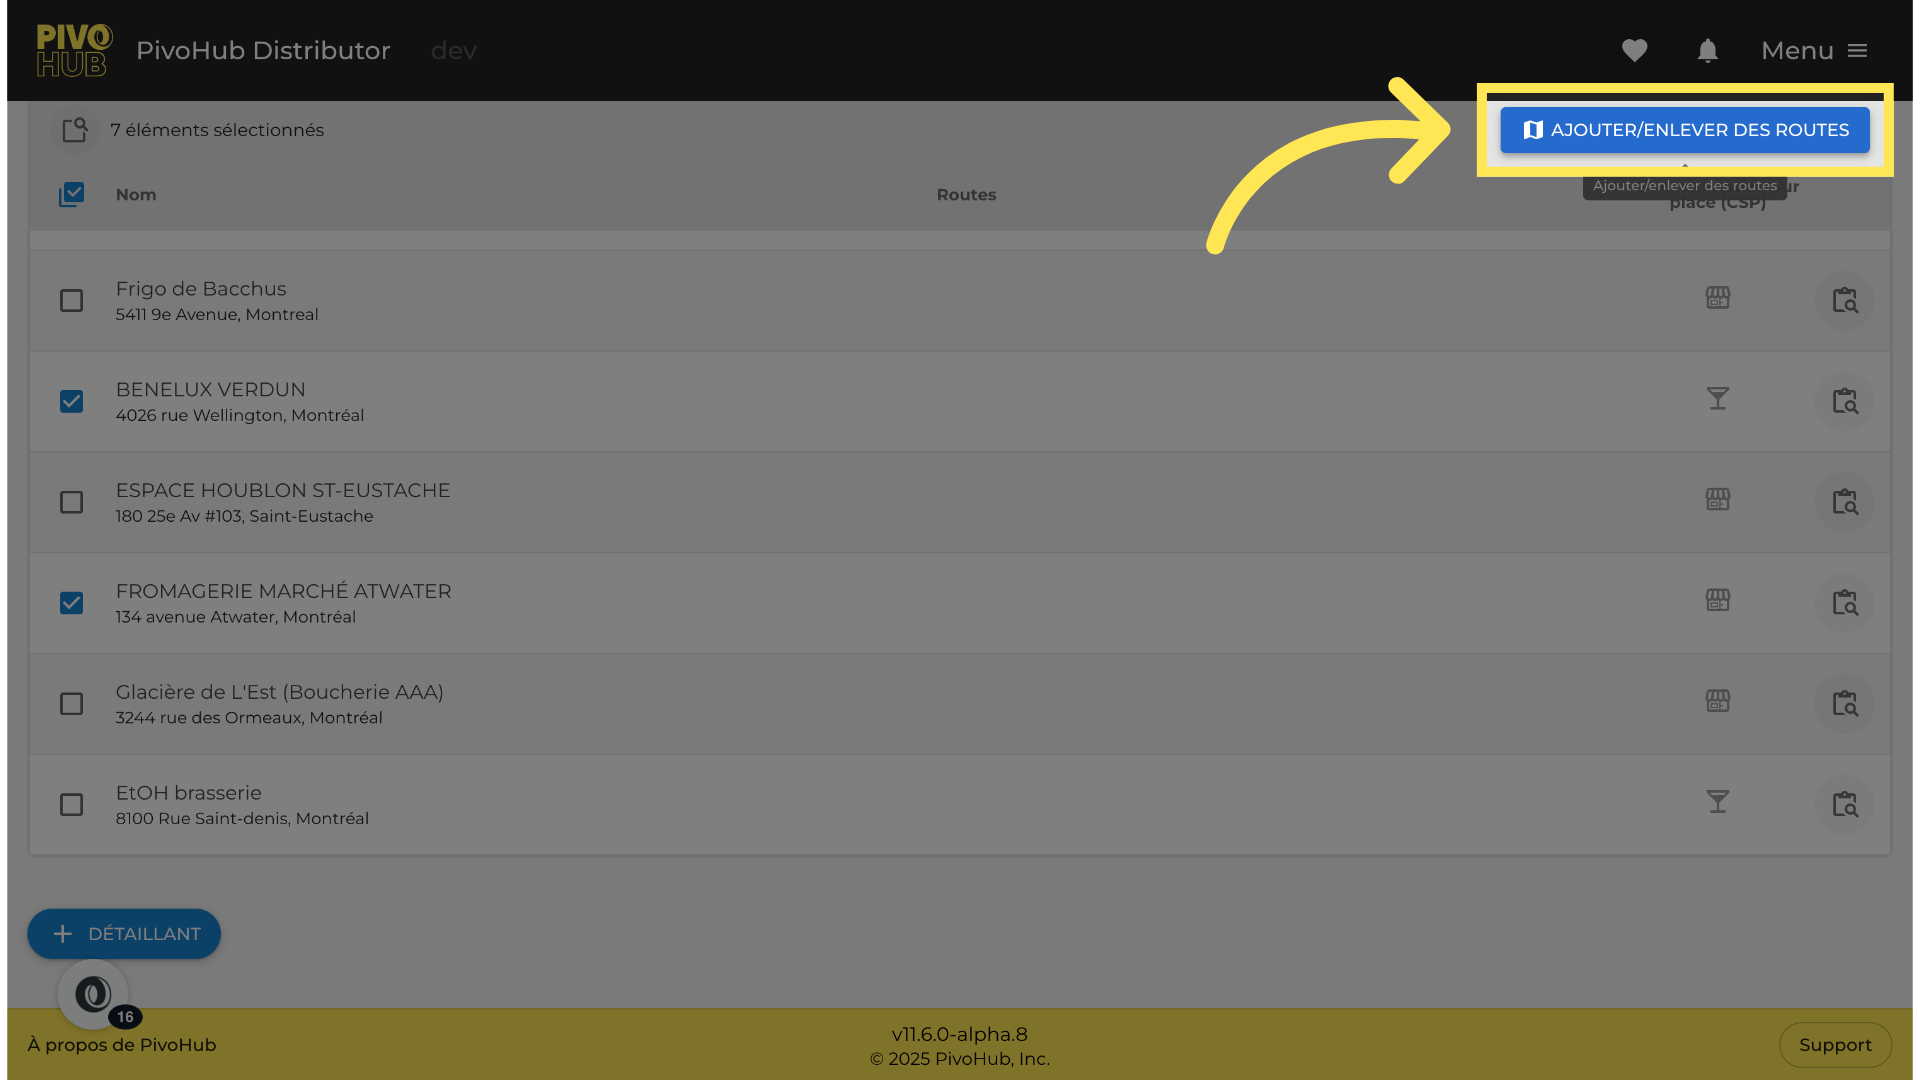
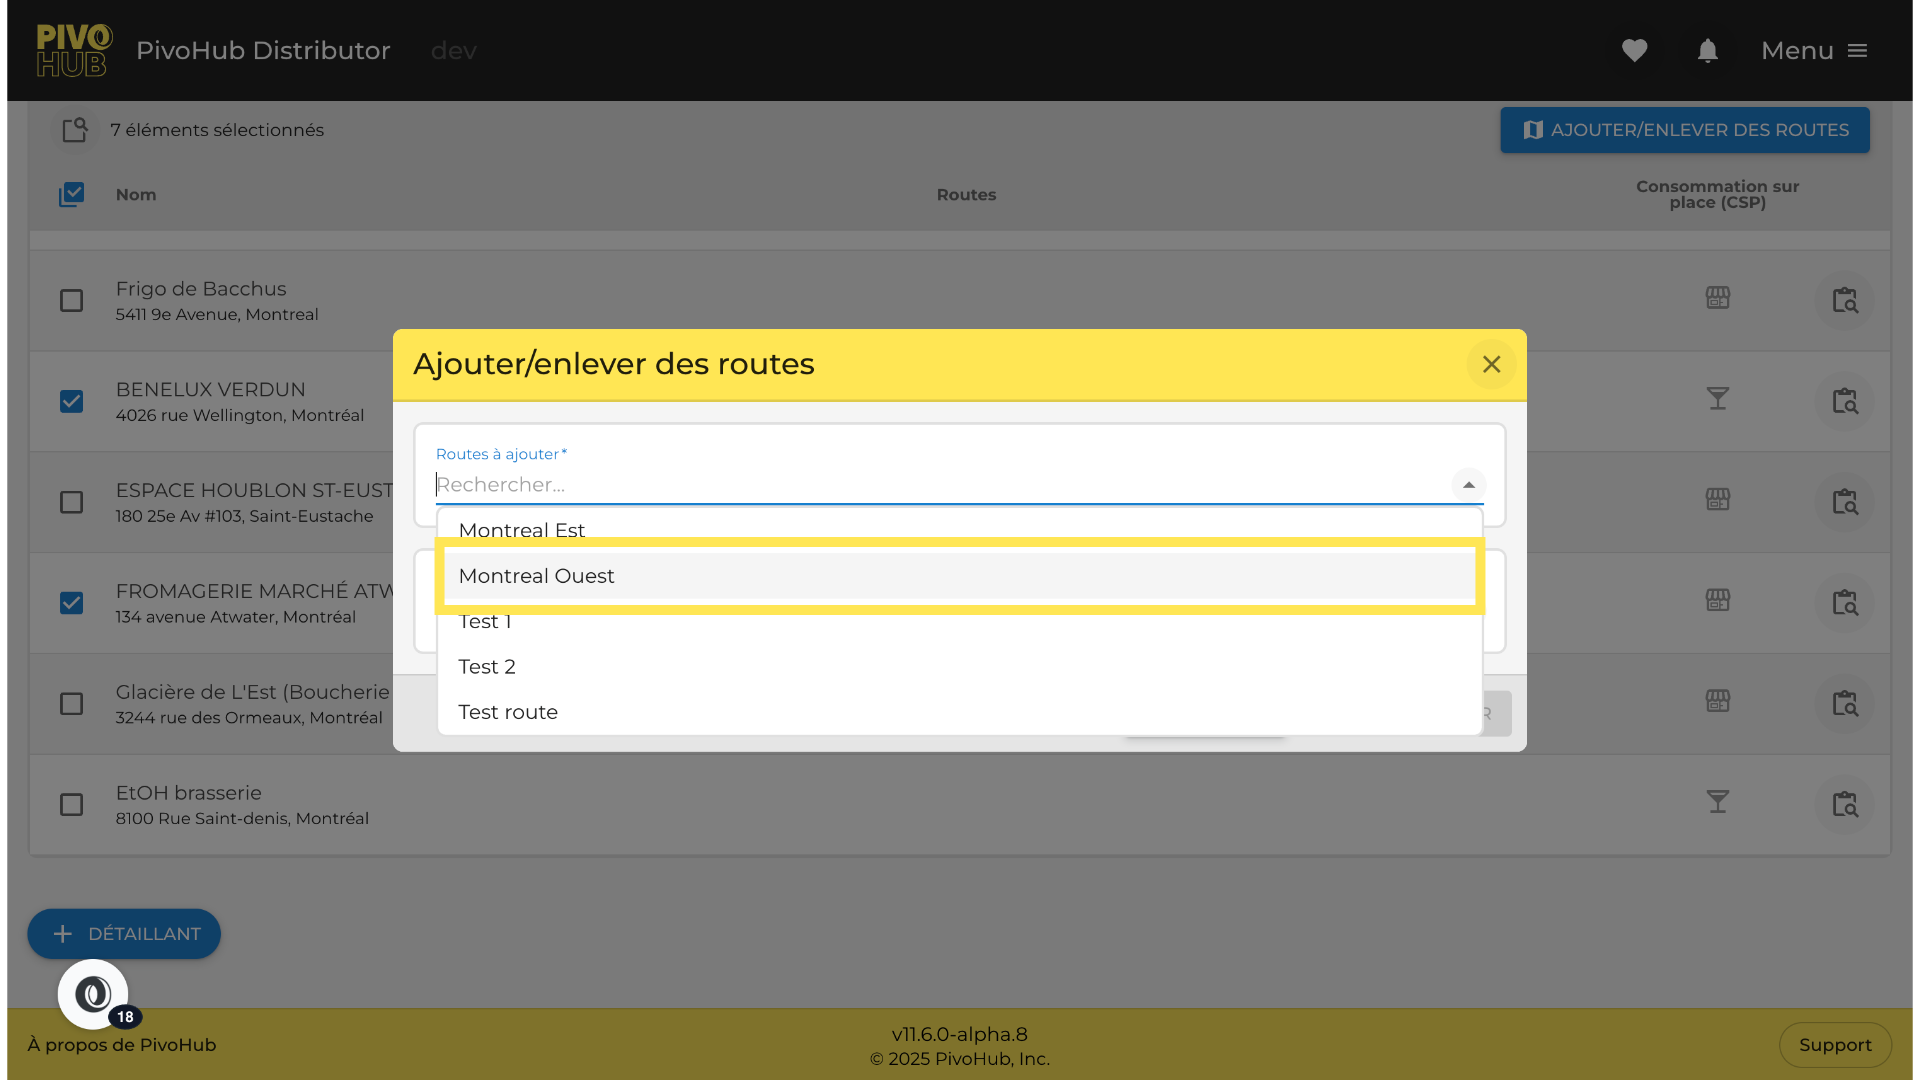
13 Select the Route
We will select the route we just created. You also have the option to add more than one route at a time. You can also remove routes through this same window.
14 Save the changes
Save your selection
15 Confirm the add
And confirm the addition in the next window.
16 Visualization of Your Route on the Map
Now, let's go see this road on the map.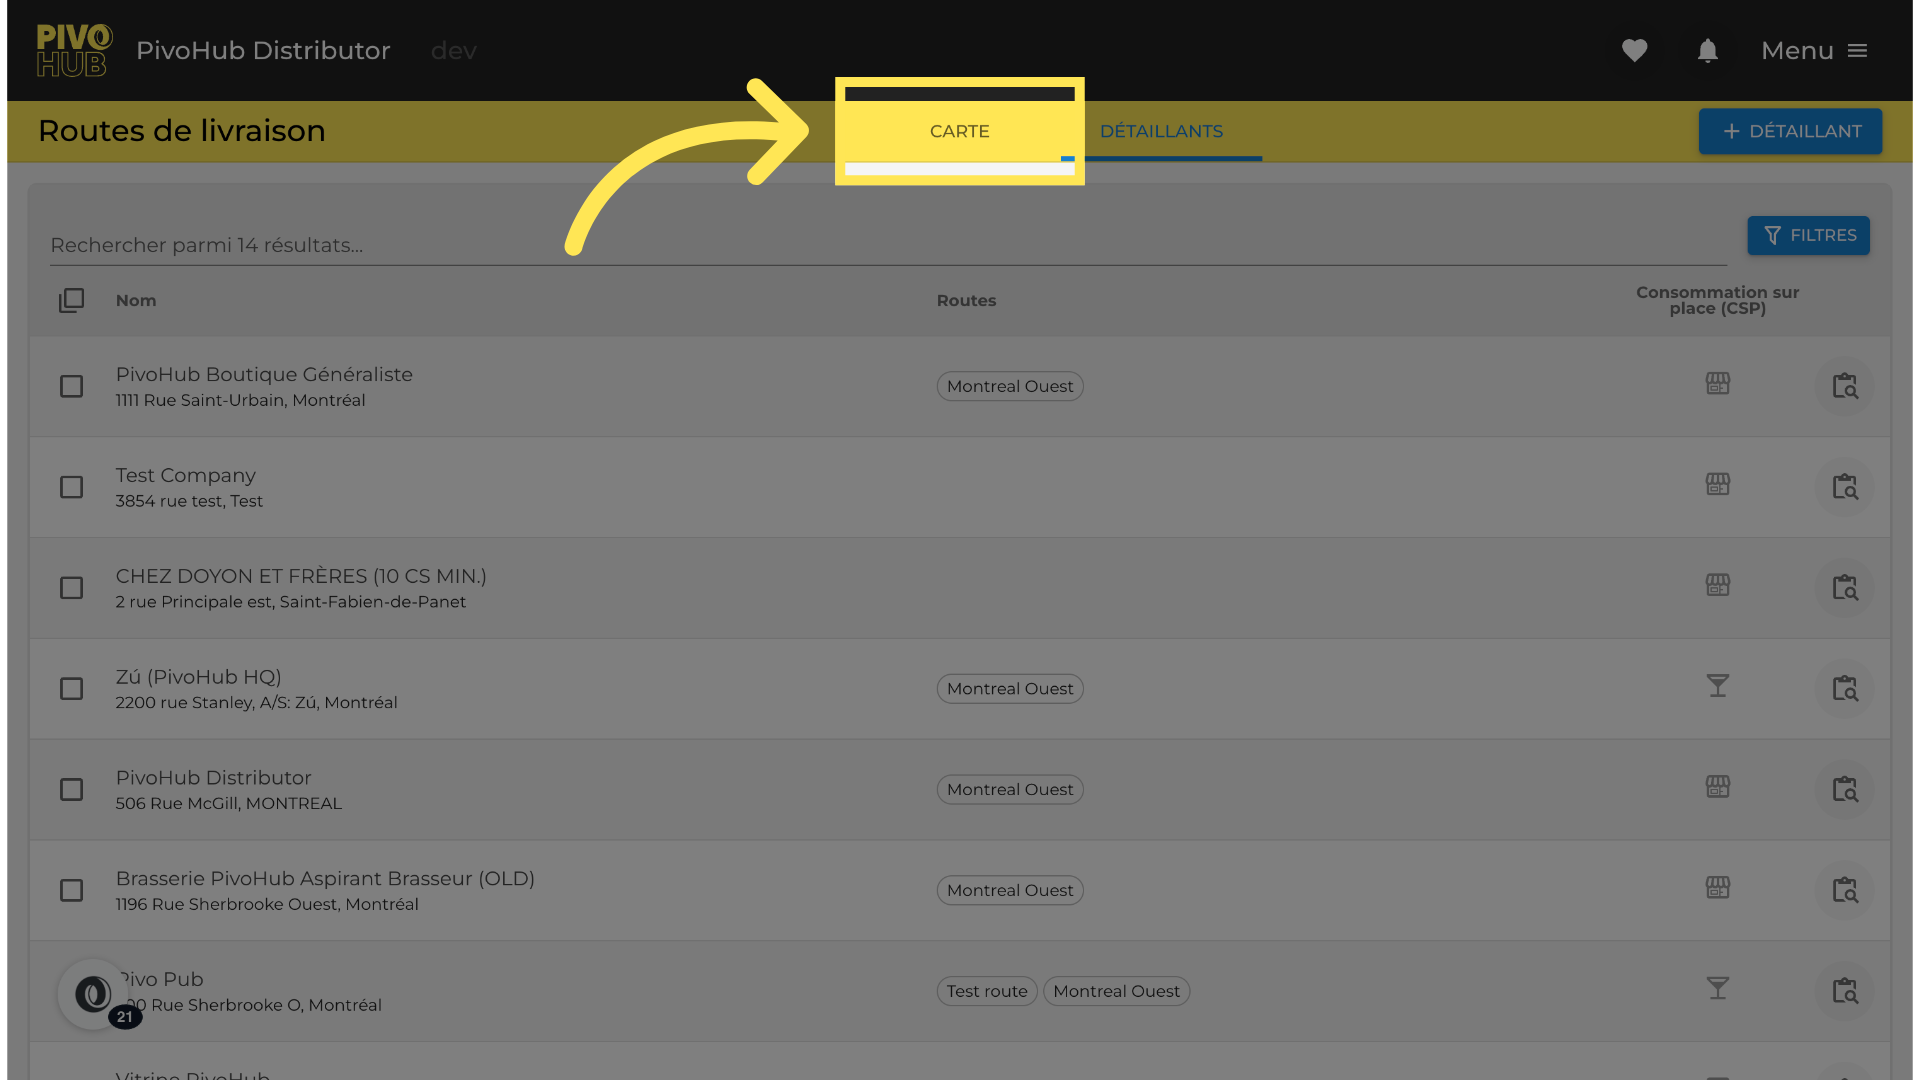
17 Apply a filter.
Let's apply a filter to the new route. It will be displayed on the map.
18 Pick a route to observe
Choose an itinerary
19 Choose a route

20 Which retailers to display
You have the option to display only the retailers on the road or all your retailers.
21 Confirm your choice of filter.

22 To see your route more clearly, you can adjust the zoom on the map.

23 Putting a customer on a route with a geographic view
In our example, we notice a retailer located near our new route that should be included.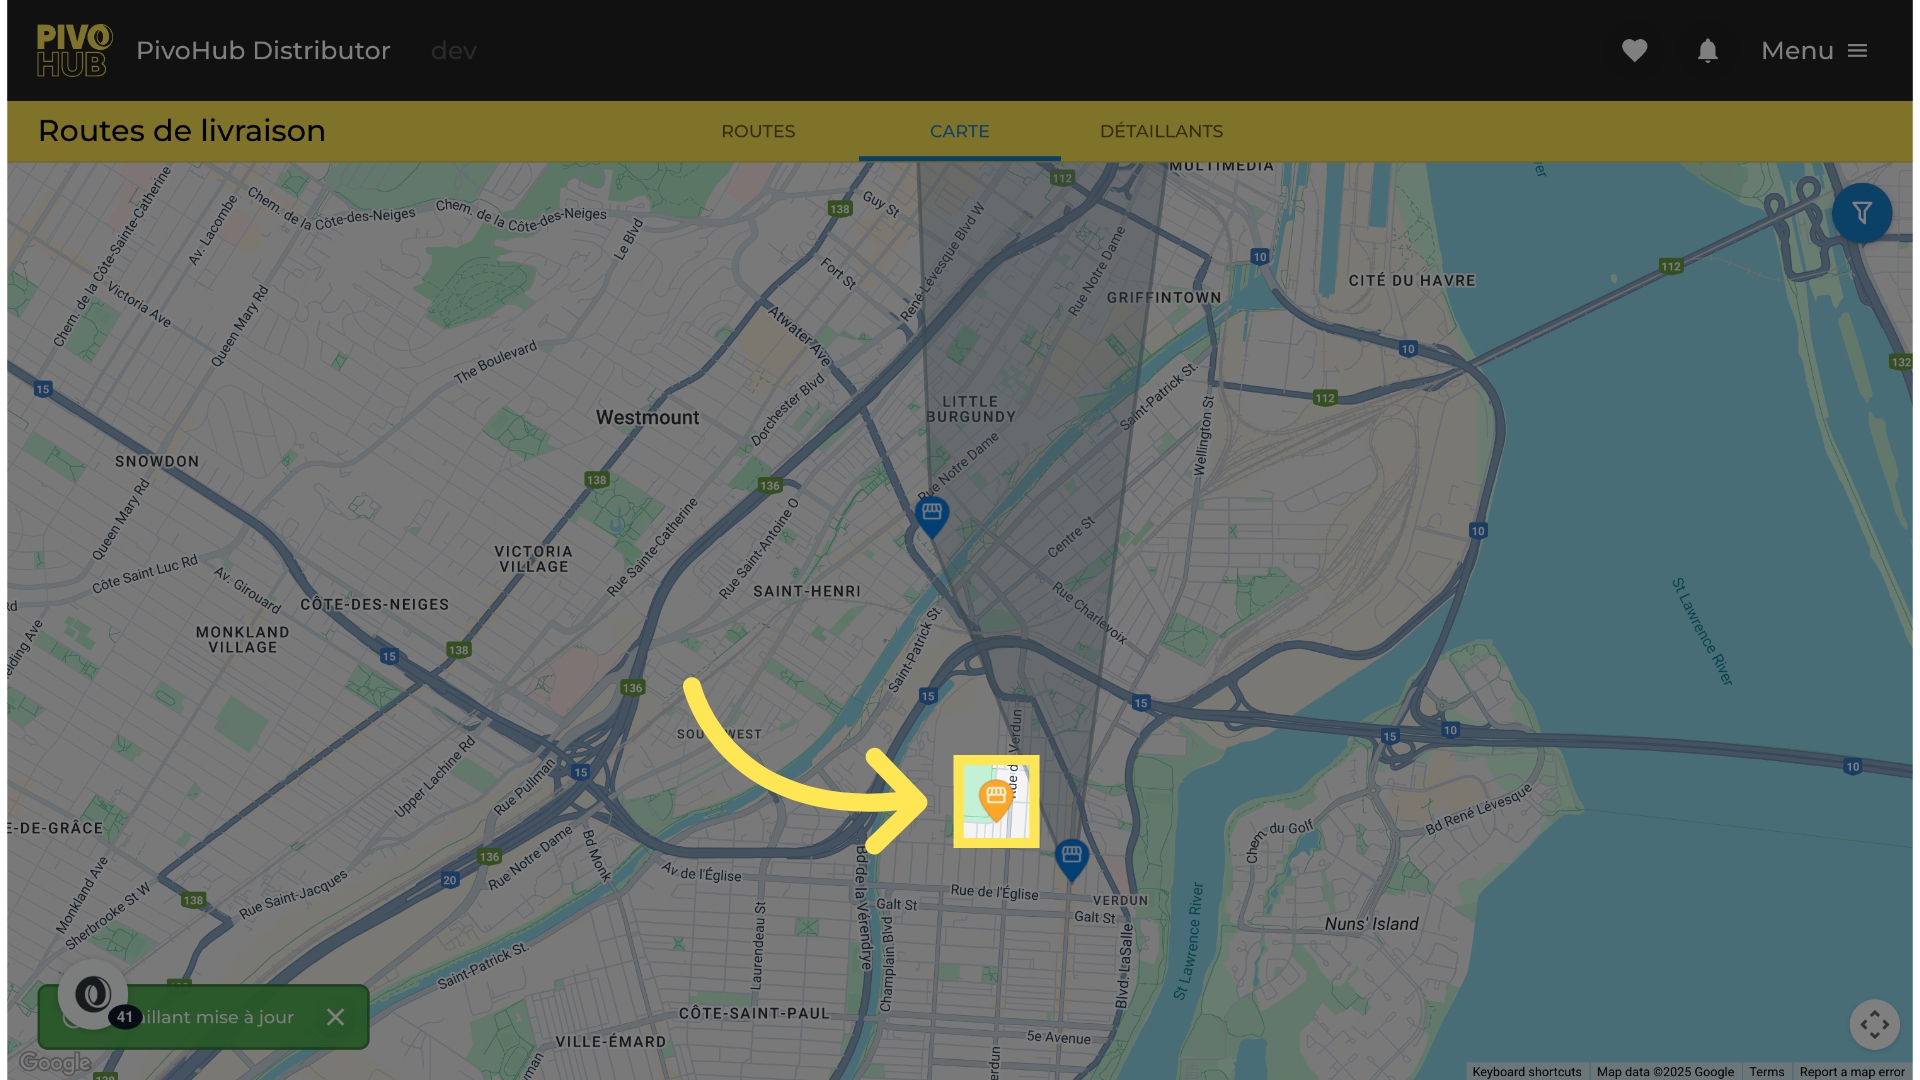
24 Click on the route to which you want to add the customer.

25 Confirm your choice
save your selection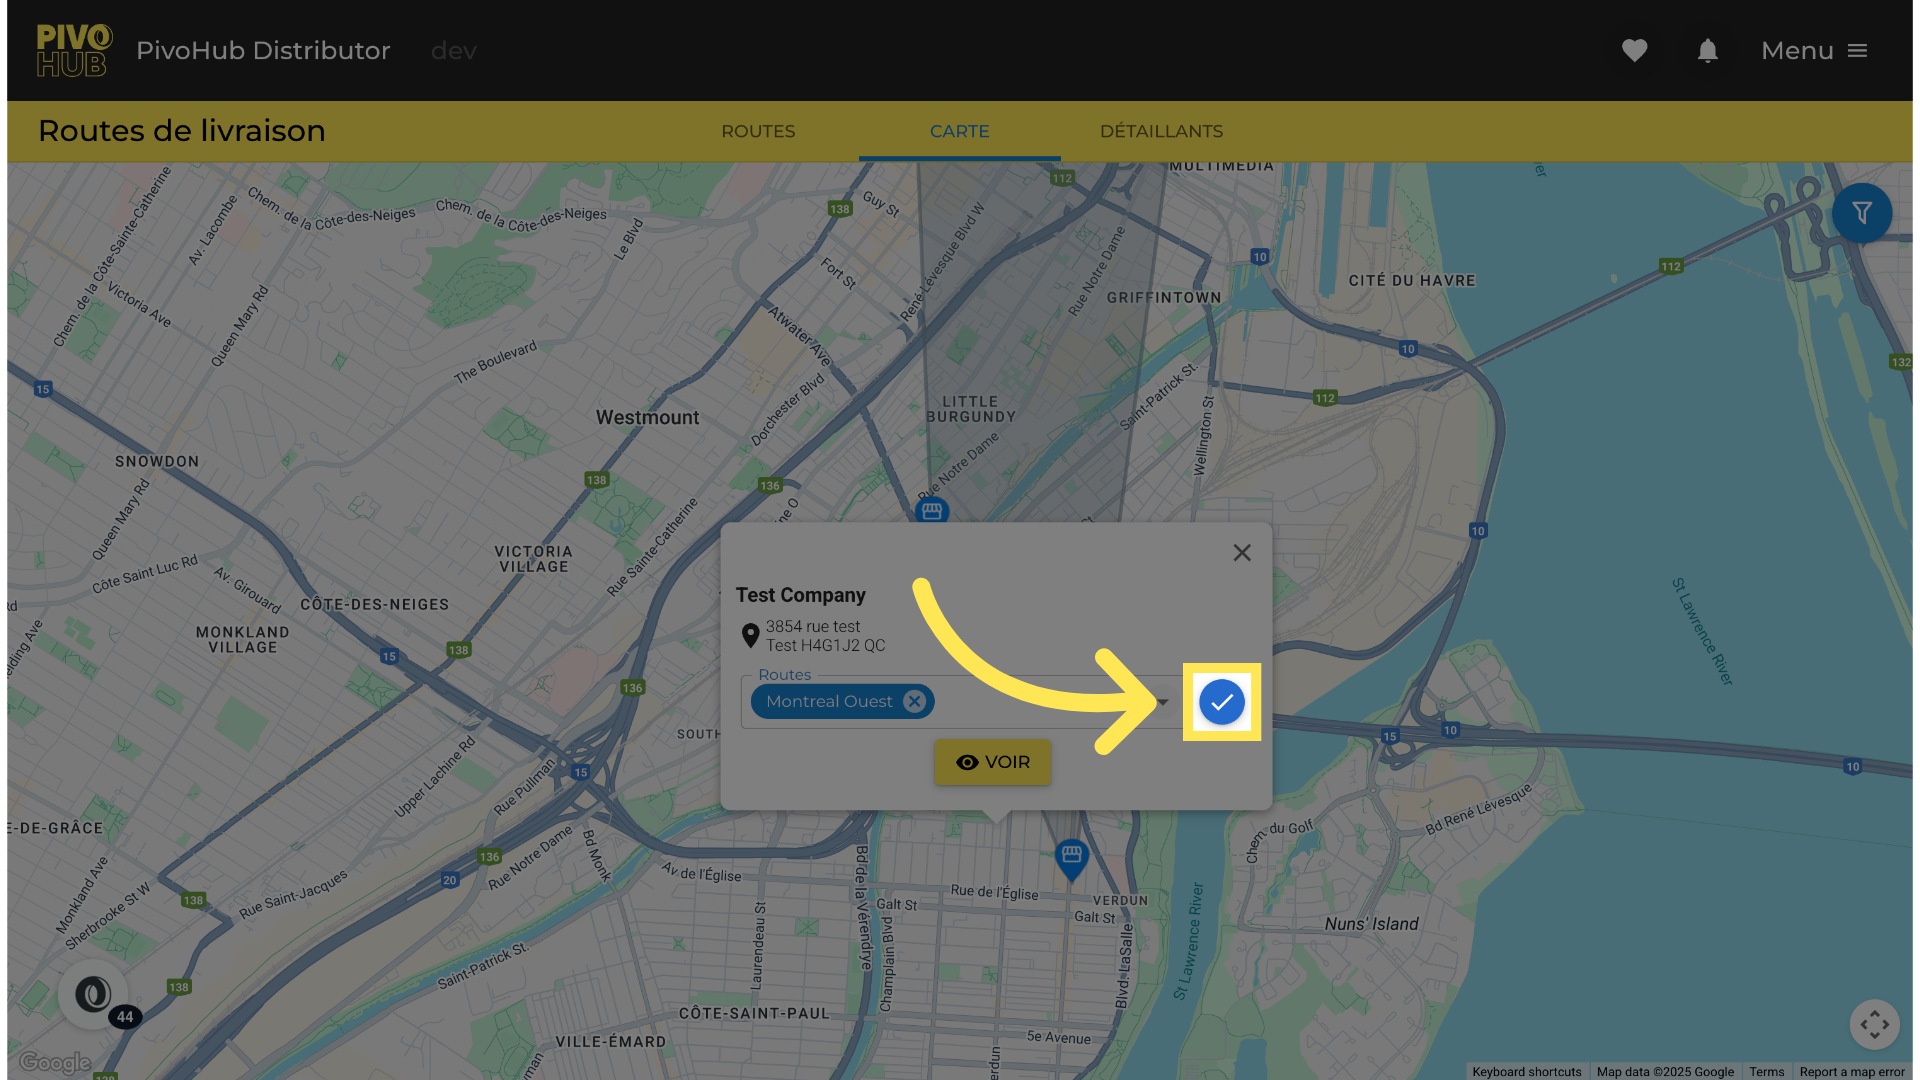
26 Close the window

27 Result of adding a client to a route
And there you go, this retailer is now added to the new route.
Was this article helpful?
That’s Great!
Thank you for your feedback
Sorry! We couldn't be helpful
Thank you for your feedback
Feedback sent
We appreciate your effort and will try to fix the article